


I really enjoy gift giving and have a hard time buying people gift cards, or sending something that they could buy anywhere. Sure, I do both, but I try to minimize it as much as I can. I have always felt that gifts should be unique, special, and memorable. I want a gift to incite happiness, a fond memory, and to serve as a reminder of the friendship and love I have for that person. Since entering the incredible world of motherhood, I’ll be the first to admit that my gift giving skills have suffered, greatly. Prior to having a baby, I’m sure most of my friends and family would attest to the fact that my cards and gifts were always early, and almost always hand wrapped. Now, I find myself sending apology texts for being late and scramble to throw something together that looks presentable and isn’t “gift wrapped” by the company I ordered it from. Not something I’m proud of, and definitely something I’ve placed in the “fix it … fix it now” category!
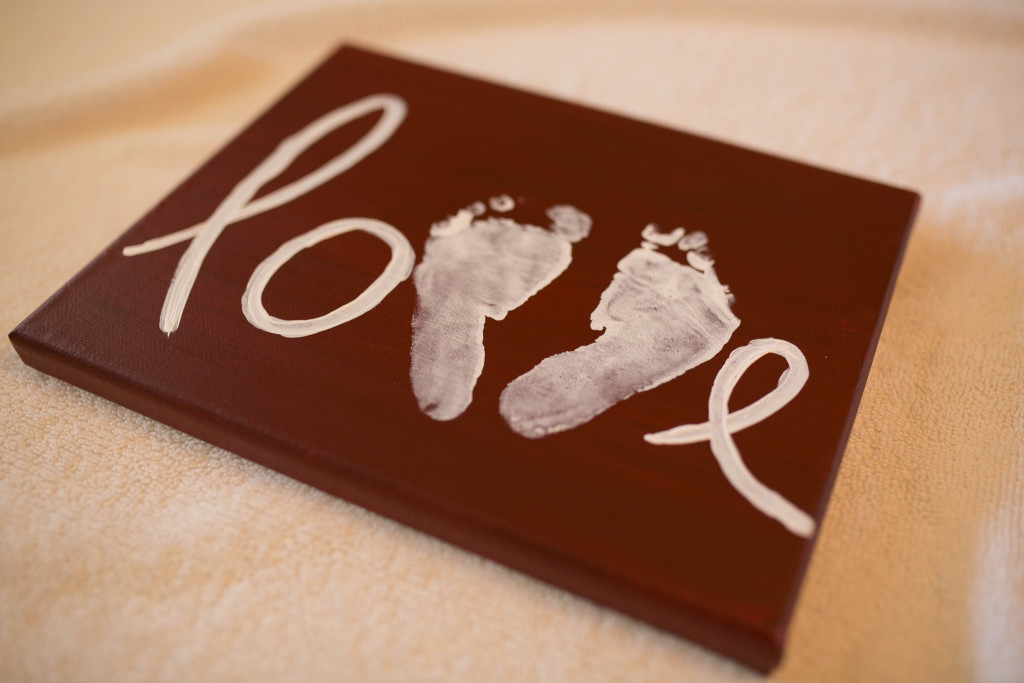
In an effort to remedy this situation to a bit more of a manageable level, I was on the hunt for a gift idea that would incorporate my little man and also evoke the love that we have for our closest friends and family. This DIY LOVE SIGN is a perfect gift for any occasion and I thought I’d share in case you’re in need of a great, easy, do-it-yourself, heartfelt, gift idea.
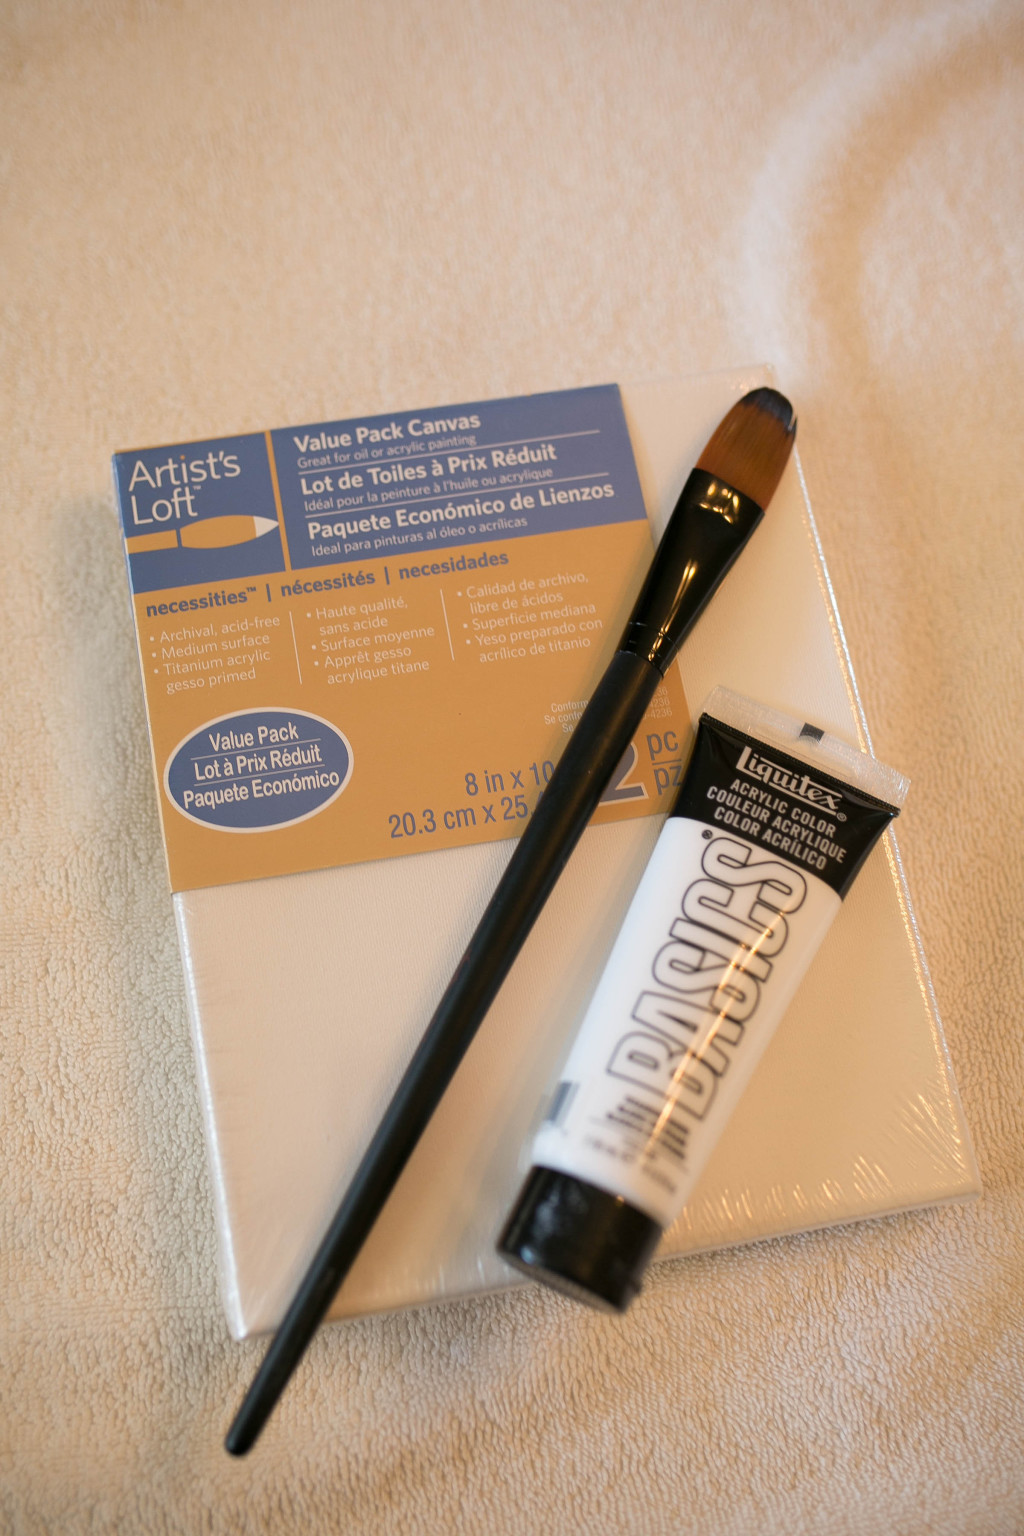
Supplies needed are minimal. I bought everything at Michael’s (who doesn’t love their amazing coupons!). You need canvases (I used 8×10 and planned for a few extra in case I needed a re-do), brushes (one large and then 1-2 really small ones), acrylic paint (I made the mistake of starting with a non-toxic, water-based type that was a complete waste of my time), something to serve as a palette (I used plastic plates I had at home), and some old towels to throw down to cover your work space.
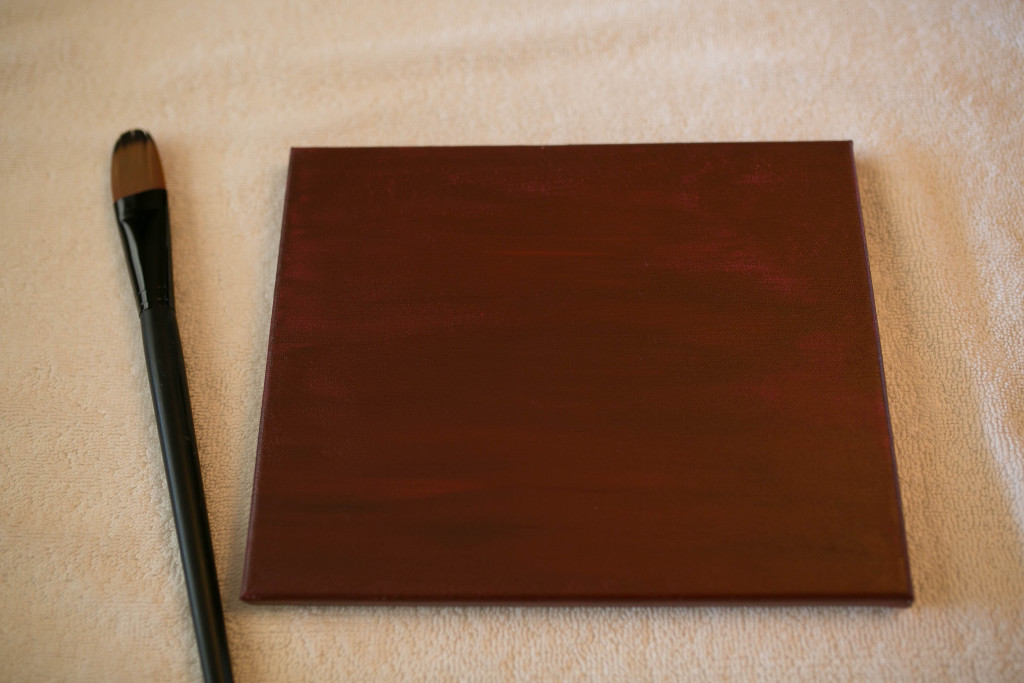
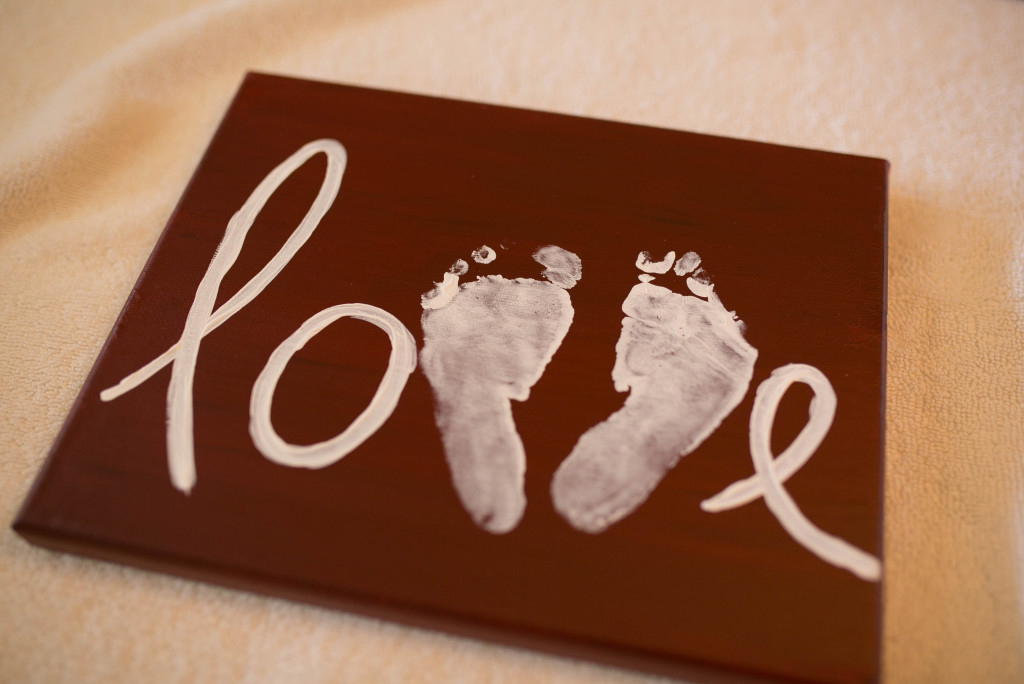
Select your colors and lay down your background color(s). As you can see, I kept mine pretty basic, but you could get as creative as you want with this. I found I had to paint two coats to get the look I was hoping for, but pending your paint and desired outcome, you may not need to.

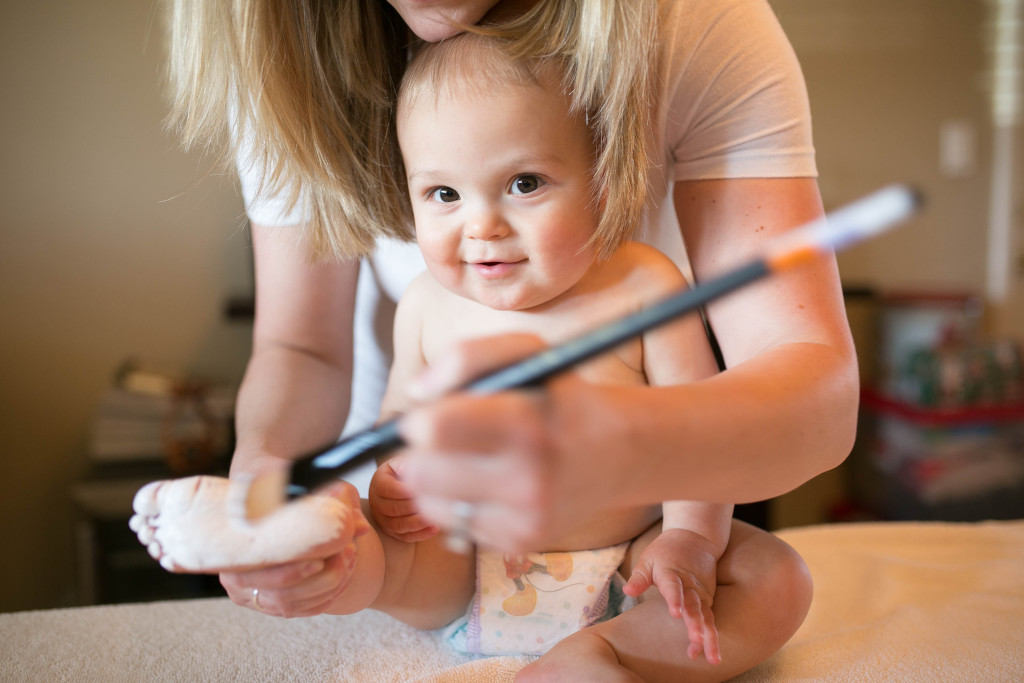
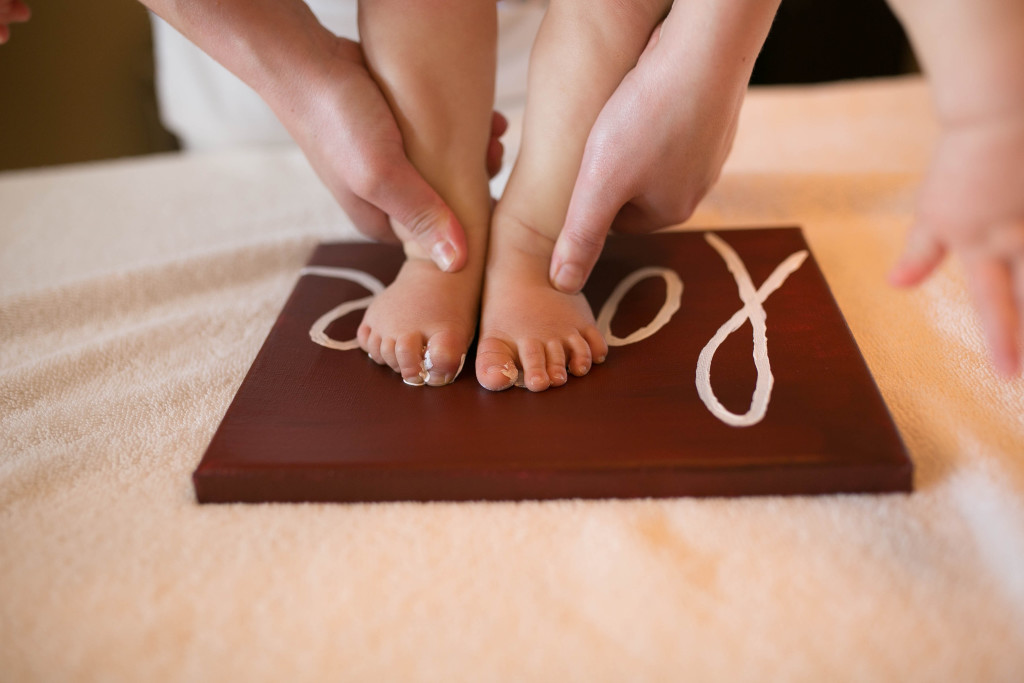
Once dry, I would then recommend painting your letters. I actually traced my son’s feet on a piece of paper and cut them out in the shape of a V in order to serve as a place holder while I did the lettering. But after I did the first few, I knew about how much space I needed and tossed the cutout. I will say that free-handing the letters was probably the hardest part of the process, for me anyway. I’m a bit of a perfectionist, and I had a hard time keeping the paint consistent when I applied the second coat to each letter. But, looking back at the finished product, it seemed to blend in pretty well and seemed less noticeable.
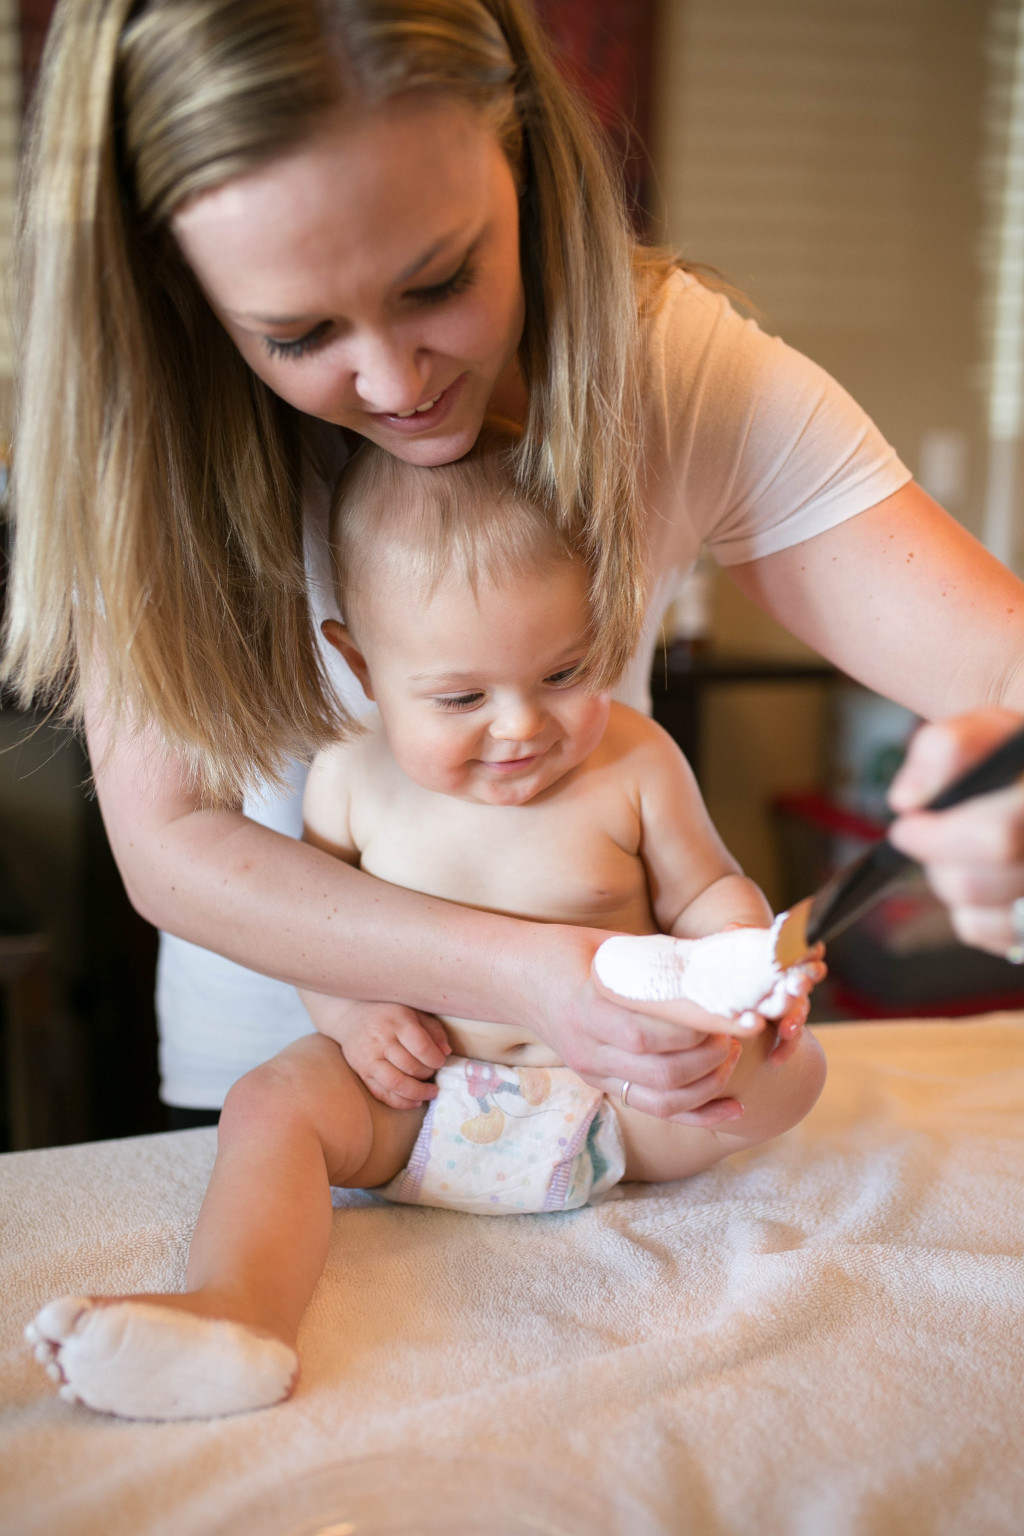
After the lettering dries, get your kiddo! We went clothing-free and kept my son in a diaper. We also had towels down and surrounding the area, and then made a b-line for the bathroom to wash his feet immediately afterwards (the paint came off incredibly easily, and his skin was fine, in case you’re wondering or worried about it). If you have a second set of hands for this step, it is in your best interest. My husband helped me with the round we did for the holiday gifts; I did this round myself. Both worked, but it was easier with help! Make sure you coat your child’s feet with paint, fairly generously. When you’re ready, be sure you place his/her feet on the canvas in the shape of a V with your child almost completely above the canvas. Then press down (ensuring you press each toe for the best footprint), and then have your second set of hands lift the child up, vertically, over the canvas. The “lift off” is critical! I definitely had several of my canvases come out with some smooshed or missing toes. I was okay with this, as I am one that believes a piece of art from an infant/toddler should be authentic and imperfect, but if you’re wanting a more polished finished product, be sure you take your time when you stamp the tootsies!
Let your piece dry, and you’re all set! I’d recommend adding a personalized note, date, and child’s age to the back. This was a huge hit in our family and I’m sure your family and friends will love it too! If you try it, snap some photos (or have your second set of hands take a few) and tag us @nphxmoms on Instagram and don’t forget our hashtag, #nphxmoms. We’d love to see how yours turn out!
 Wishing you and yours a wonderful love-filled Valentine’s Day!
Photography by: Dream Photography Studio


This is the cutest ever!!! Great post 🙂